Hiking Alone Safely: Build Solo Trail Confidence Fast
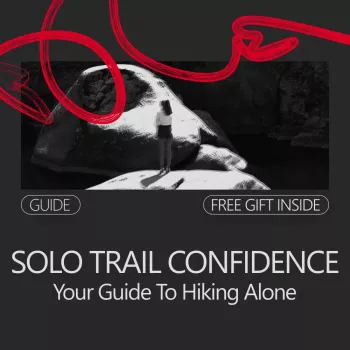
Solo Trail Confidence: A Practical Guide to Hiking Alone Safely and Enjoying the Experience
Hiking alone can feel intimidating at first, but confidence grows quickly with the right preparation, simple safety systems, and on-trail habits that keep decisions calm and clear. Solo outings become far less stressful when each hike follows the same repeatable rhythm: plan well, communicate clearly, execute conservatively, then review what worked. The goal isn’t to eliminate every risk—it’s to manage common risks thoughtfully so you can enjoy the quiet, the focus, and the sense of capability that comes with moving through the outdoors on your own.
What “confident solo hiking” actually looks like
Confident solo hiking is less about fearlessness and more about having a process you can trust. That process usually looks like: plan the route and timing, communicate your itinerary, hike with steady pacing and frequent checks, then review your decisions afterward so the next solo trip feels even smoother.
It also means giving yourself easy early wins: short mileage, familiar trails, good weather windows, and an early turnaround time that you follow without negotiation. Independence is a skill set—navigation, hydration/food timing, pacing, and decision-making without outside validation. Each solo hike is practice, not a performance.
Choose the right first solo routes
For the first few outings, stack the deck in your favor. Choose trails with clear signage, modest elevation gain, and straightforward junctions. If possible, start on routes with consistent foot traffic and reliable cell coverage (or easy bailouts back to a road or trailhead). That way, you’ll spend your attention enjoying the hike—not managing uncertainty.
Match the route to today’s fitness and comfort level rather than an aspirational goal. A “controlled” day builds confidence faster than a heroic day that ends in exhaustion. A simple progression plan works well: repeat a trail you’ve already done with friends, then expand distance or elevation slowly. Most importantly, set a hard turnaround time and treat meeting it as success, even if the summit is close.
A simple pre-hike safety system (that reduces anxiety)
A basic itinerary prevents mental spirals because you’re not improvising under stress. Write down the trailhead, planned route, mileage, start time, expected return time, and a backup plan (shorter loop or out-and-back). Share it with a trusted contact, and agree on a check-in method plus a “no-contact” escalation time.
Check weather twice—once the night before and once right before leaving. Pay extra attention to wind, storms, heat advisories, and quick temperature drops. Also review local rules like permits, wildlife advisories, water availability, seasonal closures, and fire restrictions. When in doubt, use a stoplight check: green (go), yellow (modify), red (don’t go).
Quick Solo Hike Readiness Check
| Area | Green (Go) | Yellow (Modify) | Red (Don’t Go) |
|---|---|---|---|
| Weather | Stable forecast; no major alerts | Wind/heat/cold concerns; adjust route/timing | Thunderstorms, extreme heat/cold, wildfire smoke |
| Route familiarity | Known trail or very clear route | New trail but simple with bailouts | Complex navigation, poor signage, no bailouts |
| Energy & health | Well-rested; no acute issues | Low energy; shorten distance | Injury, illness, dizziness, severe fatigue |
| Gear & supplies | Navigation + water + layers + light | Missing non-critical item; compensate | No navigation or insufficient water/insulation |
| Communication | Plan shared; check-in set | Plan shared but spotty coverage; add buffer | No one knows your plan; no check-in |
Gear that supports calm decision-making (without overpacking)
Solo gear is about preventing small problems from turning into big decisions. Start with navigation basics: downloaded offline maps, a charged phone, and a backup method (paper map/compass or a secondary device). Add the non-negotiables: enough water capacity for the day, calorie-dense snacks, an insulation layer, rain/wind protection, and a headlamp (even on “day” hikes).
For broader safety guidance, the National Park Service’s hiking safety overview is a solid reference: https://www.nps.gov/articles/hiking-safety.htm. For backcountry-first-aid skills, the American Red Cross wilderness training resources can help you plan: https://www.redcross.org/take-a-class/first-aid/wilderness-first-aid.
On-trail habits that build confidence fast
Managing common fears when hiking alone
Getting lost
Wildlife
Encountering strangers
Injury or sudden weather
Feeling overwhelmed
How to enjoy solo time (not just “get through” it)
A practical digital guide for building solo trail confidence
If you want a structured, repeatable approach, Solo Trail Confidence: Your Guide to Hiking Alone (digital guide) is designed for hikers who want clear steps when nerves, uncertainty, or “what if” thinking gets loud. It focuses on preparation, safety systems, mindset tools, and realistic progression so solo hiking becomes something you can do again and again—not just once.
For layering and everyday comfort planning (especially if you like a simple, go-to midlayer for trailheads and travel days), Zip It Up: The Ultimate Guide to Styling Your Zip-Up Hoodie Like a Pro offers practical outfit ideas and styling structure that can help keep your kit feeling familiar and easy to wear.
FAQ
Is it safe to hike alone as a beginner?
It can be, as long as the route is appropriate and you’re prepared. Start with short, familiar, well-traveled trails, check the weather, share a plan with someone, and make conservative decisions (including turning around early).
What should someone tell a friend before a solo hike?
Share the trail name and exact route, where you’re parking/trailhead location, your start time and expected return time, your hard turnaround time, a backup plan, and when they should escalate if you don’t check in.
What are the most important items to carry on a solo day hike?
Prioritize water (and a way to get more if needed), food, navigation with offline maps, warm layers and rain/wind protection, a headlamp, basic first aid/blister care, a whistle, and a charged phone plus a battery pack.









Leave a comment